All FAQs
Dual Credit
The first thing to do is review the dual credit info on the UCM website.
For the most part, you will not notice a difference as a DMT student if you’re taking dual credit or if you’re not taking dual credit. That means we’re doing most of the work to earn dual credit as part of our class.
Dual credit students will have a few extra assignments depending on the dual credit courses they sign up for.
In short, you’re getting affordable college credit, taught by Dr. Harrel as part of your experience in Digital Media Technology.
Music 1470 Fundamentals of Music Technology II (1 credit hour)
Course objectives:
Fundamentals of music technology and audio production. Signal processing, system operation, and other core topics. Prerequisites: Mus 1410 and Mus 1420.
Purpose of this course:
Build upon Fundamentals of Music Technology I: Hardware and Fundamentals of Music Technology I: Software to complete the introduction of the core fundamentals of audio production, equipping students with the foundational knowledge required for success in more advanced courses.
Course objectives:
After completing Fundamentals of Music Technology II students will possess a working knowledge of common signal processing techniques, typical approaches to session setup and organization, industry-standard solutions for common production challenges, and other core knowledge relevant to most live sound and audio production environments.
COMM 1519 Media Aesthetics (3 credit hours)
Course Description:
This course focuses on the analysis and production of fundamental image and sound elements in visual and aural media. During this course, we will cover the following topics:
- Media Literacy-critical consumption of media and critical thinking about mediated programs.
- Media Convergence-technologies now allow messages to be produced and consumed through various media.
- Critical Analysis of media aesthetics, including:
- Light
- Color
- Two-dimensional Space
- Three-dimensional Space
- Editing (Time and Motion)
- Sound
- Developing messages for mass media, including:
- Semiotics
- Media aesthetics
- Screen grammar and conventions
Course Objectives (At the end of this class, each student will be able to):
- Understand and provide examples of each aesthetic field.
- Produce messages that incorporate and exemplify each aesthetic field.
- Critically analyze the aesthetic fields in a film or video.
Studio One
If you want to use the Warm Audio BUS-COMP to “glue” your mix together or add the character of CineMag transformers, check out the Warm Audio BUS-COMP – Checklist. This is a specialized list for fine-tuning the compression settings on your final output before you “Print” your mix.
Here’s a checklist for using the Lexicon.
There is also a hard copy of this in the Studio One handbook.
Let me know if you have additional questions.
Please see the Mic Signal checklist.
There is also a hard copy in the Studio One handbook.
Let me know if you have questions.
There are a few different ways to do this and few key steps.
Start by making a Copy of your Project so you make sure it’s saved as a package, and also so you can leave the current version on the computer you’re working on as a backup.
- Go to File > Save a Copy As
- Save as a package (not a folder)
- Name the file with “[Song Title] – for mix”
- Close the original project
From the Finder, find the [Song Title] – for mix Logic project file. This is the file you can share by AirDrop, the Network Drive (blue globe on the Dock), or Google Drive.
Advanced Level
If you want to take a look at a full professional approach to sharing a Logic project with another engineer. Check out this video:
If you have finished your mix and are ready to capture the sound of the Trident 68 and the Apollo converters into a final Stereo File, you need the Mix Print Checklist. This guide covers the specific routing needed to “record” your mix back into Logic Pro while avoiding feedback loops and managing your analog headroom.
Some background info: Why do we call it “Printing” a Mix?
In the modern world of “In-the-Box” mixing, you usually just hit a button called Bounce or Export, and the computer does the work to save a final audio file. In a hybrid studio like ours, we do something called a Mix Print.
- The History: Back in the day, the final mix was played live through the console and recorded (or “printed”) onto a physical piece of 1/4-inch Master Tape. Once it was on the tape, that version of the song was “set in stone” — much like ink printed on a page.
- The Modern Version: Even though we aren’t using tape today, we are still “printing” the sound of the Trident console, the Lexicon effects, and the Warm Audio Bus-Comp back into Logic in real time.
- Why we do it: By “printing” the mix to a new track, you are capturing the unique “soul” of the analog hardware. Once it’s printed, you have a high-resolution stereo file that represents exactly what the console was doing at that moment.
If you want to use the physical outboard gear (like the Lexicon MX200) instead of software plugins, follow the Using Outboard Effects Checklist. This will walk you through using the “Aux Sends” on the console to feed signal from your instrument channel(s) into the hardware and how to properly return those effects back into your mix using the main section on the Triden 68.
At the start of the year, I share all of our studio calendars with you. You have full permission to edit events. That means you have to be a trustworthy professional. Sometimes, due to how Google handles calendar sharing, it’s a problem for DMT creatives.
Google often hides automated invitations in your inbox. If you have been granted permission (if it’s September or later in the school year, the answer is probably “yes, you do have permission”), but don’t see the calendars, follow these steps to get set up and start reserving space.
Step 1: Add the Calendars (Desktop/Laptop)
Open Google Calendar in a web browser, then click the links below to “claim” each room:
- Add A105/06 Studios A/B (Video Production)
- Add A156B Bob White Practice Room
- Add A156C Kirt Mosier Practice Room
- Add Studio One/Control Room
Note: Once you click “Add,” check the left-hand sidebar under “Other calendars” to ensure the box next to the room name is checked.
Step 2: How to Reserve a Room
To make a reservation, you must create the event on the room’s calendar, not your personal calendar (which happens by accident all the time):
- Click + Create in your calendar.
- Click the Calendar Selection dropdown (it usually shows your name by default).
- Select the specific Room Name from the list.
- Name your event (e.g., “Smith – Vocal Tracking”) and Save.
If you create the event on your personal calendar by mistake, other students will not be able to see that the room is occupied!
As always, let me know if you have any additional questions.
I’ve got just the thing to help you out.
There is also a hard copy in the Studio One handbook.
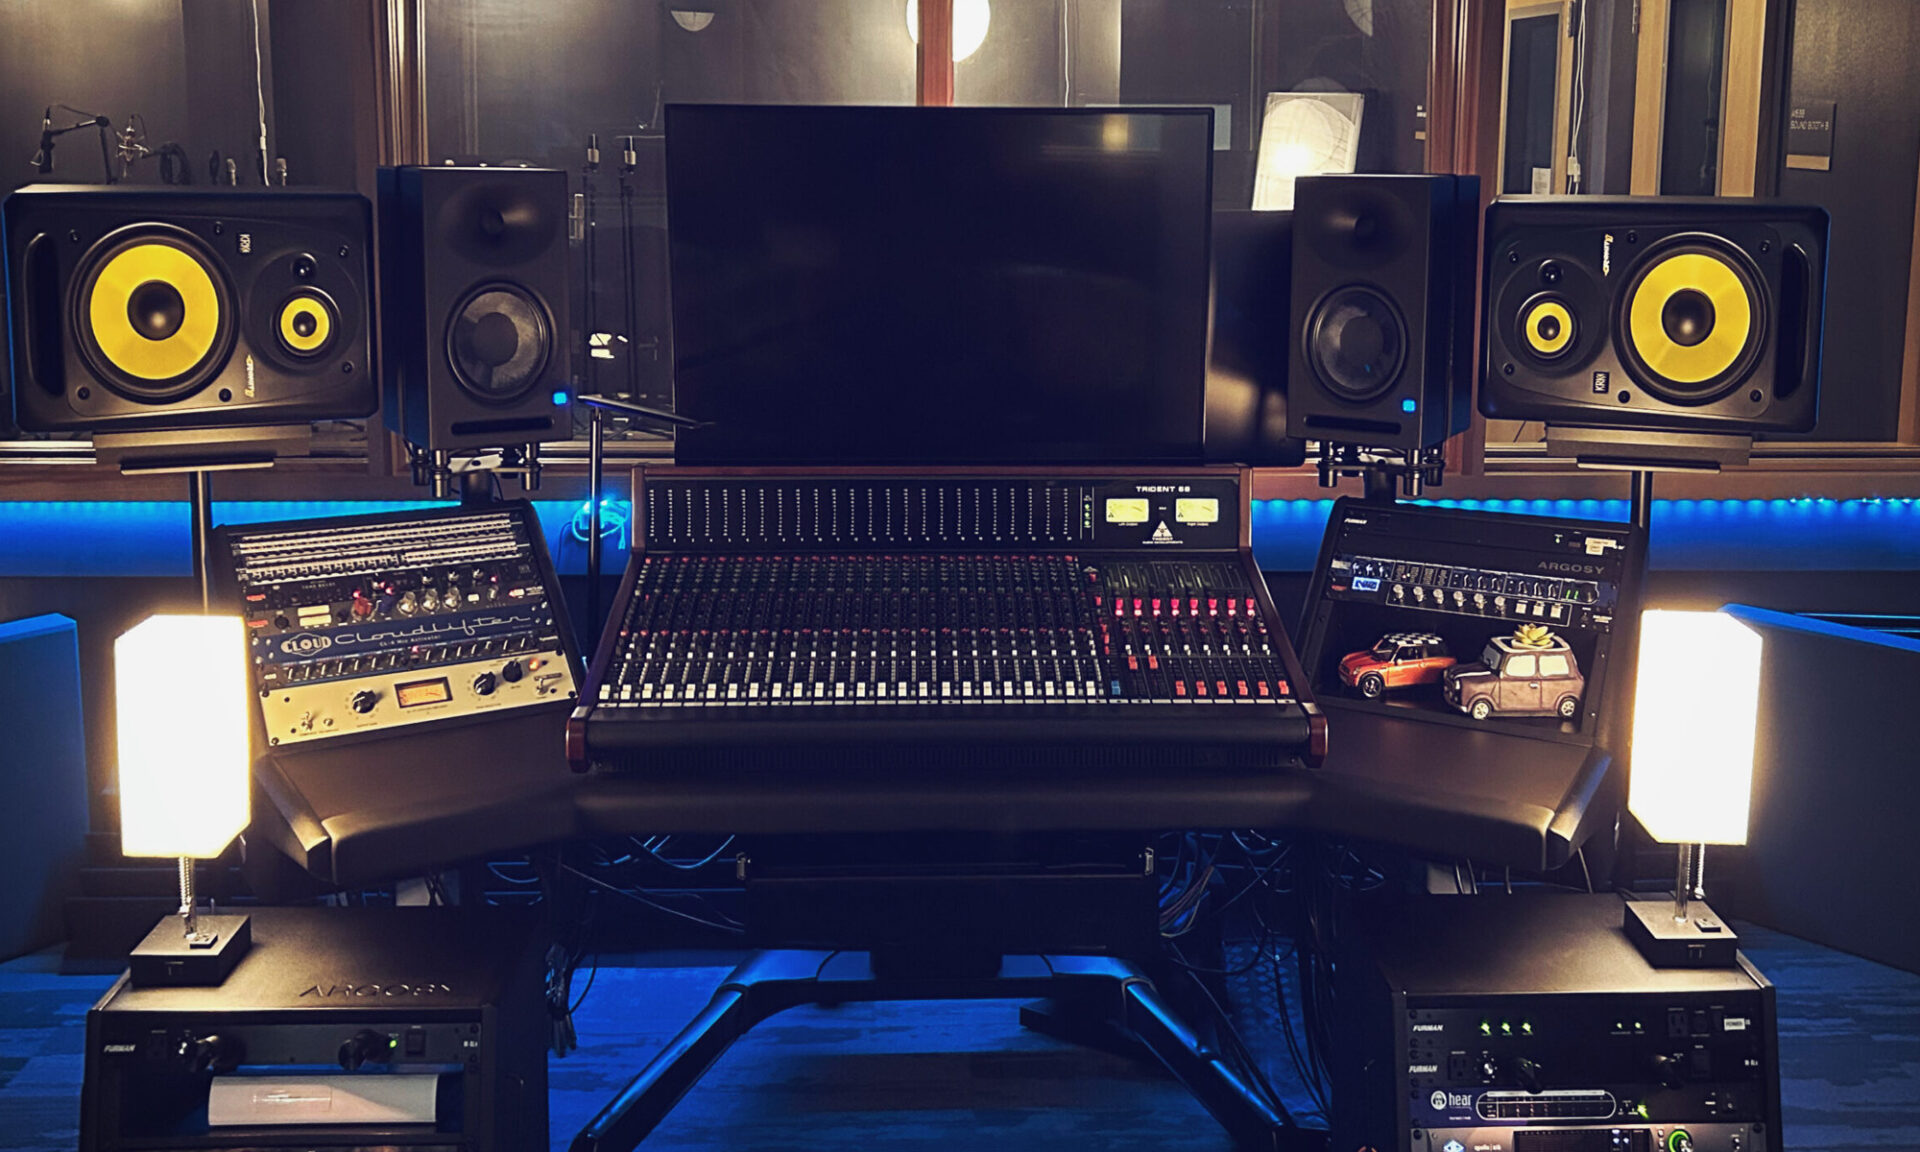
The Studio One handbook is a white binder labeled “Control Room.” It is located on the side table (or occasionally the bookshelf) inside the control room.
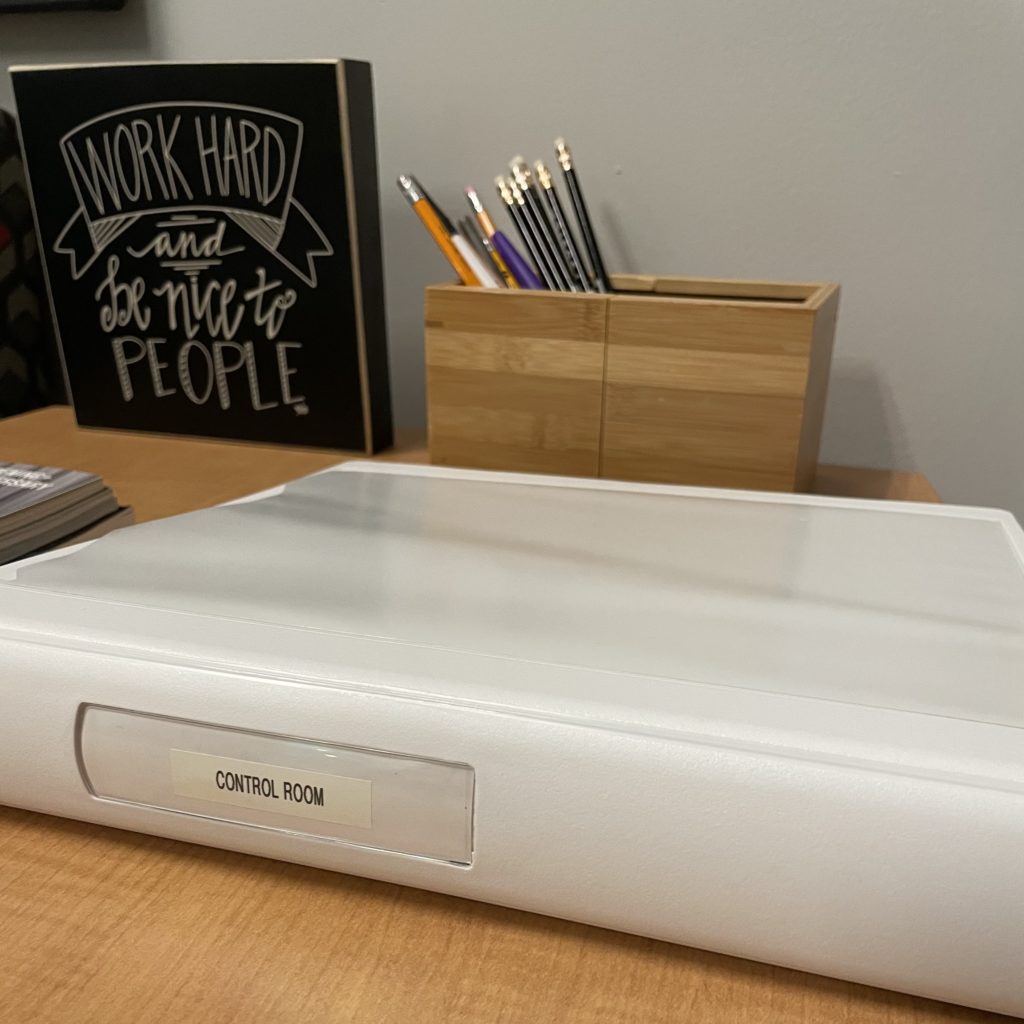
Inside this binder, you’ll find instructions for all the hardware located in Studio One.
There is also a collection of checklists that will be updated and added to occasionally. I may point you to this handbook to answer a question.
This handbook is a reference that you might find useful when setting up a particular microphone or troubleshooting a piece of gear.
If you think of something that needs to be included in the handbook, please let me know!
Mac
You should have the network drive icon on your dock, next to the Trash Can icon:
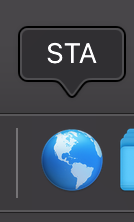
If you don’t see that globe icon, you can still access the network drive.
From the Finder, select the Go drop-down menu, then “Connect to Server…“.
Copy/Paste “smb://R7FS/Collaborate/MacShare/STA” into the box and press enter. Use your login information to connect.
Click this link to get started:
Make sure you follow this link to use LinkedIn Learning with your LSR7 library card info.
What is your LSR7 library card?
Your MCPL card number is LS+Student Number (LS1234567). The student number is your lunch number.
The password/PIN uses your student ID number again: P1234567
If you’re not an LSR7 student, you probably don’t know your 7-digit lunch number.
How do I find my LSR7 Student Number?
Login to PowerSchool using your Mac login information (no @lsr7.net after your user name).
You can find your number by clicking on “Student Credentials” on the left-hand side of the page.
I’ve got a video that answers this question. Check it out and let me know if you have questions!
First, make sure you’re using Chrome. Find your user account in the top right corner of the browser. Sign out and sign back in again. Make sure you choose to Link your account and Sync the data. Quit and reopen Chrome.

Go to YouTube and make sure you are signed into your LSR7 YouTube account. You’ll find the sign-in and account icon in the upper right-hand corner of the page.
You might have to go through our filter login (Securly is the name) — this is all required for smooth video operations, so that’s a good thing.
Go back to the Quest and refresh the page (Command-R).
If none of that works, click your profile image in Chrome and select “Manage People.” On the following page, remove your profile (and any others that might appear) and start the process over again.

I’ve got just the thing to help you out.
There is also a hard copy in the Studio One handbook.
Digital Media Lab lab computers have a standard naming convention of MSTA-LAB-DM-XX, with the “XX” changing to numbers or letters depending on which computer you’re sitting at or the room you’re in. Here’s a map of the lab and adjacent rooms to help you solve the mystery:

This is typically a polarity issue — in other woeds, the pedal is sending the wrong MIDI data values (e.g., 0 when pressed, 127 when released when Logic is expecting the opposite).
Here’s a good video that covers it, or if you’d prefer to read below:
How do I fix sustain pedal polarity in Logic Pro?
Use the Environment window to reverse the MIDI data:
- Open Logic Pro and press Command + 0 to open the Environment.
- Create a Transformer object.
- Route it like this: Sum → Transformer → Input Notes → Sequencer Input
- Set the Transformer to filter or remap MIDI CC 64 values (sustain) to reverse the behavior.
Here’s some additional information
Q: What MIDI message is used for sustain?
MIDI Control Change CC64 is used for sustain pedal data.
Q: Are there other fixes?
- Check your pedal or keyboard for a polarity switch.
- Try software modifiers or consult community forums for device-specific tips.
Q: Any tips to avoid this in the future?
- Test pedals in multiple apps.
- Know your controller’s MIDI implementation.
- Learn to use Logic’s Environment for advanced troubleshooting.
Projects
When a client completes our project request form, it automatically creates a new project in Basecamp. I’ll ensure the project is “all access,” which means you can join the project yourself.
When you join an All Access project, you’ll need to change yourself from “just following” to “on the project” to ensure you don’t miss any important notifications.
Here’s how to do it:
- from the Basecamp homepage, click “View all in a list” at the top of the project
- Click “join” on the project you want to join.
- Click “Set up people” and change your status to “on the project.”
Here’s a quick video walkthrough:
Click this link to get started:
Make sure you follow this link to use LinkedIn Learning with your LSR7 library card info.
What is your LSR7 library card?
Your MCPL card number is LS+Student Number (LS1234567). The student number is your lunch number.
The password/PIN uses your student ID number again: P1234567
If you’re not an LSR7 student, you probably don’t know your 7-digit lunch number.
How do I find my LSR7 Student Number?
Login to PowerSchool using your Mac login information (no @lsr7.net after your user name).
You can find your number by clicking on “Student Credentials” on the left-hand side of the page.
There are a few different ways to do this and few key steps.
Start by making a Copy of your Project so you make sure it’s saved as a package, and also so you can leave the current version on the computer you’re working on as a backup.
- Go to File > Save a Copy As
- Save as a package (not a folder)
- Name the file with “[Song Title] – for mix”
- Close the original project
From the Finder, find the [Song Title] – for mix Logic project file. This is the file you can share by AirDrop, the Network Drive (blue globe on the Dock), or Google Drive.
Advanced Level
If you want to take a look at a full professional approach to sharing a Logic project with another engineer. Check out this video:
If you know of a possible client who wants us to do work for their business or organization, send them a link to our project request form.
Once they complete the form, Dr. Harrel will be notified by email, and the process can begin.
Not every project is a good fit, but we do as many projects as we can!
At the start of the year, I share all of our studio calendars with you. You have full permission to edit events. That means you have to be a trustworthy professional. Sometimes, due to how Google handles calendar sharing, it’s a problem for DMT creatives.
Google often hides automated invitations in your inbox. If you have been granted permission (if it’s September or later in the school year, the answer is probably “yes, you do have permission”), but don’t see the calendars, follow these steps to get set up and start reserving space.
Step 1: Add the Calendars (Desktop/Laptop)
Open Google Calendar in a web browser, then click the links below to “claim” each room:
- Add A105/06 Studios A/B (Video Production)
- Add A156B Bob White Practice Room
- Add A156C Kirt Mosier Practice Room
- Add Studio One/Control Room
Note: Once you click “Add,” check the left-hand sidebar under “Other calendars” to ensure the box next to the room name is checked.
Step 2: How to Reserve a Room
To make a reservation, you must create the event on the room’s calendar, not your personal calendar (which happens by accident all the time):
- Click + Create in your calendar.
- Click the Calendar Selection dropdown (it usually shows your name by default).
- Select the specific Room Name from the list.
- Name your event (e.g., “Smith – Vocal Tracking”) and Save.
If you create the event on your personal calendar by mistake, other students will not be able to see that the room is occupied!
As always, let me know if you have any additional questions.
Please be mindful of personal and equipment safety when filming off-campus.
First, make sure you let me know your filming plan so we can address any concerns before the project starts.
Then, complete the permission form. (Keep reading to see what happens next.)
Once you submit the form:
- An email will be sent to you, me, our attendance secretary, and your parent/guardian email address you entered in the form.
- After reviewing the information in the email, your parent/guardian can reply all to give their permission.
- If you would prefer a paper copy of the form, I can print that and send it with you.
Check out Mind Meister. Three mind maps with the free account you can set up with your LSR7 Gmail.
There is a chance that your headphones aren’t plugged in firmly or your system settings have the audio out of balance. More than likely though, you’re editing a project where we used a single mic to record audio into one of the two stereo channels.
This is exactly what is supposed to happen.
You correct this in Final Cut Pro’s Inspector pane (Command-4) under the audio tab (see the speaker icon up top).
Select the clip(s) you want to correct (either in the Timeline or the Browser) and change the Audio Configuration to Dual Mono. Then, disable the silent channel. See below:
Digital Media Lab lab computers have a standard naming convention of MSTA-LAB-DM-XX, with the “XX” changing to numbers or letters depending on which computer you’re sitting at or the room you’re in. Here’s a map of the lab and adjacent rooms to help you solve the mystery:
Batteries are located on top of the laptop cart, just inside the door in Studio A. Help yourself, but let me know if we run out of AA batteries so I can replace them. Thanks!
Video
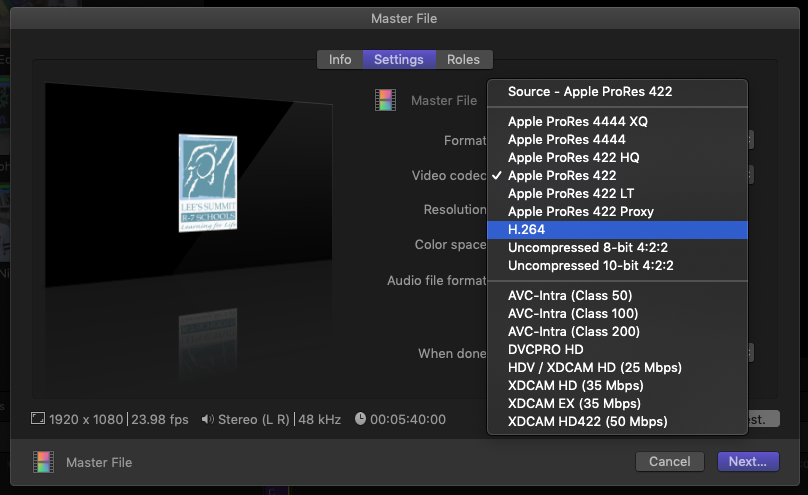
When you export (share) a video from FCP, the default option is set to a full-quality file, probably an Apple ProRes file.
Let’s be a little savvier about exporting. Go back to re-share (export) your project and double-check the Master File export settings.
Make sure you select H.264 from the Video Codec settings as shown below:
A real film would be mixed and “sweetened” in a different program than it was edited. A video editor would share a special file that translates the data from FCP X to Logic (or Premiere to Pro Tools, or DaVinci Resolve to Digital Performer, or any combination of A to B).
Follow these quick instructions to get started mixing your film like a pro!
First off, what is a cyc?
Next — it’s quite a bit more fragile than I would like.
- Please be careful about stepping anywhere other than the floor (watch the curved sections as stepping on them causes cracks)
- Avoid scuffs and marks on the floor. That will ruin it.
Got it?
Here’s some advice on camera settings.
This is a quick demonstration of what you would do with the footage in FCP:
Here’s a quick video describing the process.
In short, your project needs to be 1080i, 29.97fps, exported using ProRes 422 setting. It may be possible to use h.264 but you will need to change the setting on the Hyperdeck as well.
You can change the length of a project in the project properties inspector.
If you want a project that is 30-seconds long, type “30.” In the duration box. The “.” Acts as a shortcut to fill out the frames. If you just type “30” you will end up with a project that is 30-frames long.
I’ve got a video that answers this question. Check it out and let me know if you have questions!
Please be mindful of personal and equipment safety when filming off-campus.
First, make sure you let me know your filming plan so we can address any concerns before the project starts.
Then, complete the permission form. (Keep reading to see what happens next.)
Once you submit the form:
- An email will be sent to you, me, our attendance secretary, and your parent/guardian email address you entered in the form.
- After reviewing the information in the email, your parent/guardian can reply all to give their permission.
- If you would prefer a paper copy of the form, I can print that and send it with you.
Check out Mind Meister. Three mind maps with the free account you can set up with your LSR7 Gmail.
This is a great resource from Ripple Training. An overview of the color grading and color correction process. If you find other resources, please share them with the team on Basecamp!
There is a chance that your headphones aren’t plugged in firmly or your system settings have the audio out of balance. More than likely though, you’re editing a project where we used a single mic to record audio into one of the two stereo channels.
This is exactly what is supposed to happen.
You correct this in Final Cut Pro’s Inspector pane (Command-4) under the audio tab (see the speaker icon up top).
Select the clip(s) you want to correct (either in the Timeline or the Browser) and change the Audio Configuration to Dual Mono. Then, disable the silent channel. See below:
You’ve created a Multicam monster!
Sometimes our iMacs can’t keep up with the processing power required to run multicam clips in FCP X. Never fear, it’s an easy fix.
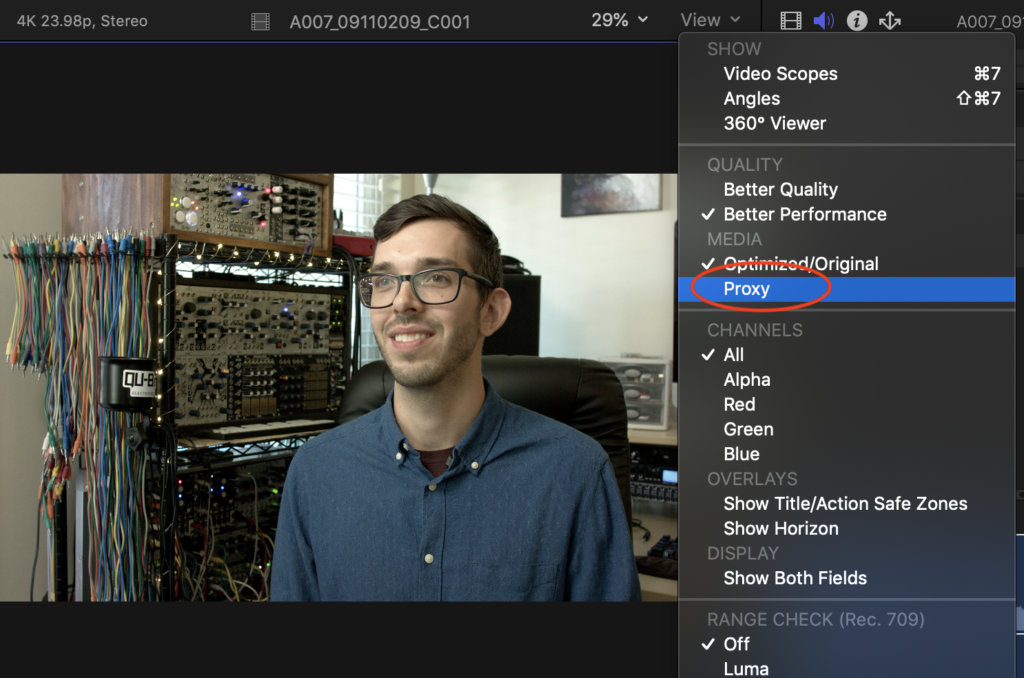
Before you start, you should know that you’re going to see a frightening red clip in the Browser after step 1, but that’s normal. Keep following the instructions to the end.
1.) In the View menu of the Viewer, change the media quality to Proxy:
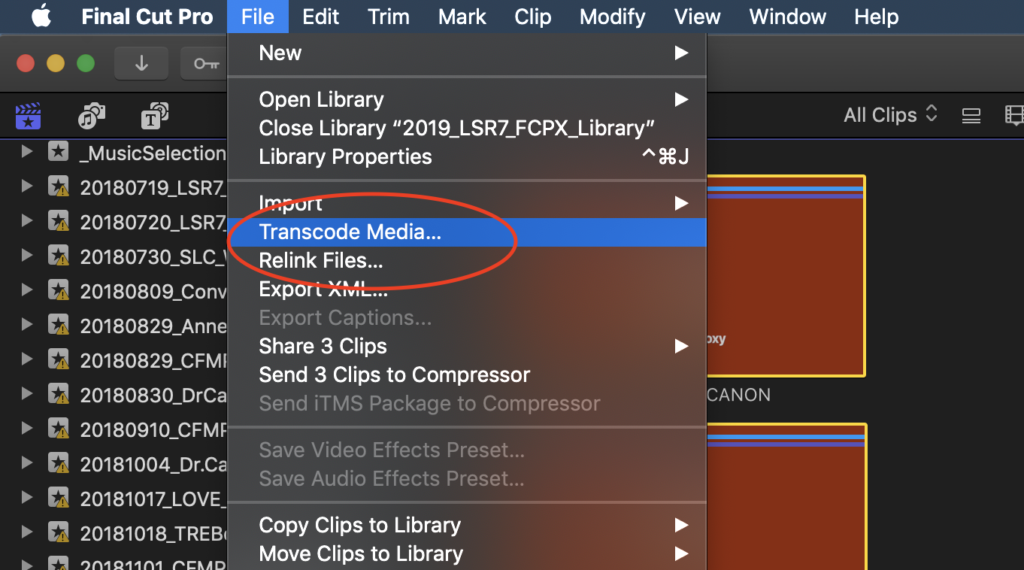
2.) Select all the media used in your multicam clips in the Browser and from the File menu, choose Transcode Media…
3.) Select Proxy and click OK. It will take a few minutes for FCP X to create your proxy media.
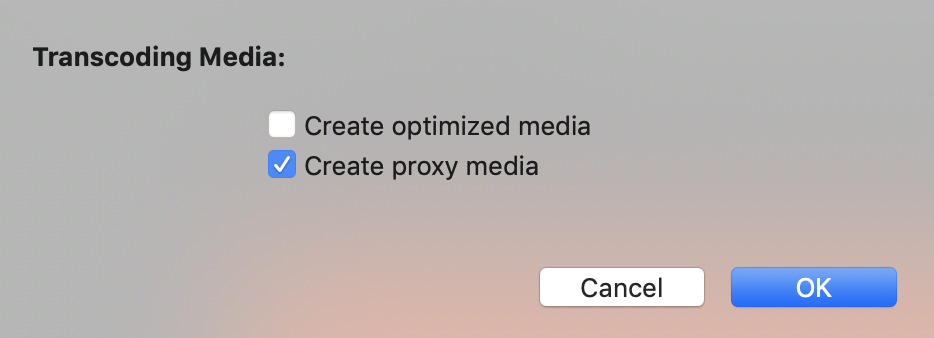
When you are ready to export, go back to step 1 and change the Media setting to Original/Optimized. FCP X will give you a warning if you don’t, but you’ve been warned before the warning now.
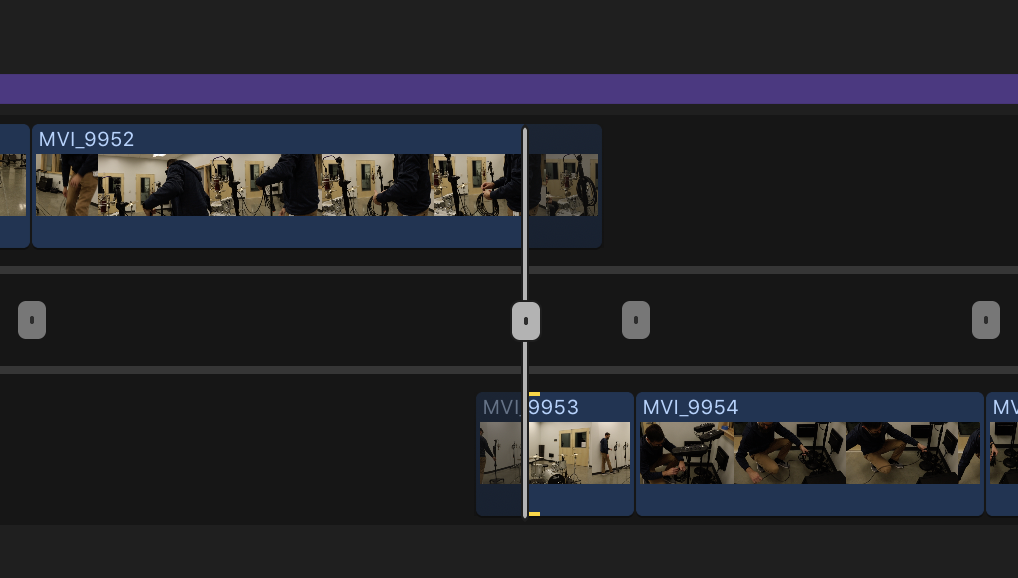
Many times, students accidentally open FCP X’s precision editor. This happens when you double-click an edit point. You may be interested in learning more about the precision editor, or you might just want your normal timeline back.
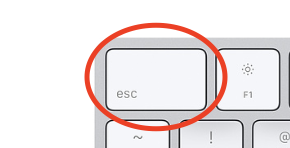
To return to the traditional editing control in the Timeline, simply double-click the edit point again or press the escape key. Now you’re back in business, never to be frightened again by the powerful precision editor!
At one time or another, we all have to contend with vertical video. Hopefully, it’s footage that someone else gave us and not something that we captured ourselves.
Here’s a handy (and free) Motion template from MotionVFX: mVertical
Essentially, this Title template from MotionVFX works like an adjustment layer.
Sometimes I might suggest you check that your text is in the title safe zone. This almost always happens on the City of LS and LS Parks and Rec videos, but sometimes on other projects too.
Here’s a video that explains everything:
It sounds like you want to use an adjustment layer for an effect that covers multiple video clips in your timeline.
- Download the Alex4D Adjustment Layer from the Docs & Files > Adjustment Layer folder of the Digital Media Technology Basecamp HQ.
- Once it’s downloaded, double-click the .dmg file to open.
- Move the folder Alex4D Adjustment Layer to your user directory in the following location: Movies > Motion Templates > Titles
Here’s a short video that shows an adjustment layer in action. Let me know if you have more questions!
Batteries are located on top of the laptop cart, just inside the door in Studio A. Help yourself, but let me know if we run out of AA batteries so I can replace them. Thanks!
Audio
You probably haven’t lost your project, and I would guess that Logic is open, just not the main workspace. Luckily, that is an easy fix.
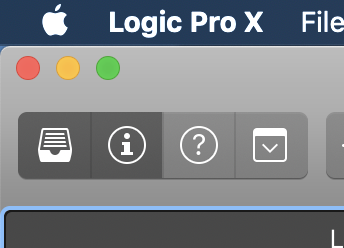
First, make sure Logic is the active application (see Fig. 1) by looking for “Logic” in the upper left-hand corner of your screen.
You have two options: (1) you can either use the keyboard shortcut Command-1

Or, (2) select Window > Open Main Window (Fig. 2) from the drop-down menu
A real film would be mixed and “sweetened” in a different program than it was edited. A video editor would share a special file that translates the data from FCP X to Logic (or Premiere to Pro Tools, or DaVinci Resolve to Digital Performer, or any combination of A to B).
Follow these quick instructions to get started mixing your film like a pro!
If you want to use the Warm Audio BUS-COMP to “glue” your mix together or add the character of CineMag transformers, check out the Warm Audio BUS-COMP – Checklist. This is a specialized list for fine-tuning the compression settings on your final output before you “Print” your mix.
Here’s a checklist for using the Lexicon.
There is also a hard copy of this in the Studio One handbook.
Let me know if you have additional questions.
Please see the Mic Signal checklist.
There is also a hard copy in the Studio One handbook.
Let me know if you have questions.
There are a few different ways to do this and few key steps.
Start by making a Copy of your Project so you make sure it’s saved as a package, and also so you can leave the current version on the computer you’re working on as a backup.
- Go to File > Save a Copy As
- Save as a package (not a folder)
- Name the file with “[Song Title] – for mix”
- Close the original project
From the Finder, find the [Song Title] – for mix Logic project file. This is the file you can share by AirDrop, the Network Drive (blue globe on the Dock), or Google Drive.
Advanced Level
If you want to take a look at a full professional approach to sharing a Logic project with another engineer. Check out this video:
If you have finished your mix and are ready to capture the sound of the Trident 68 and the Apollo converters into a final Stereo File, you need the Mix Print Checklist. This guide covers the specific routing needed to “record” your mix back into Logic Pro while avoiding feedback loops and managing your analog headroom.
Some background info: Why do we call it “Printing” a Mix?
In the modern world of “In-the-Box” mixing, you usually just hit a button called Bounce or Export, and the computer does the work to save a final audio file. In a hybrid studio like ours, we do something called a Mix Print.
- The History: Back in the day, the final mix was played live through the console and recorded (or “printed”) onto a physical piece of 1/4-inch Master Tape. Once it was on the tape, that version of the song was “set in stone” — much like ink printed on a page.
- The Modern Version: Even though we aren’t using tape today, we are still “printing” the sound of the Trident console, the Lexicon effects, and the Warm Audio Bus-Comp back into Logic in real time.
- Why we do it: By “printing” the mix to a new track, you are capturing the unique “soul” of the analog hardware. Once it’s printed, you have a high-resolution stereo file that represents exactly what the console was doing at that moment.
Follow the Level Setup Procedure Checklist.
There is also a hard copy in the Studio One handbook.
If you want to use the physical outboard gear (like the Lexicon MX200) instead of software plugins, follow the Using Outboard Effects Checklist. This will walk you through using the “Aux Sends” on the console to feed signal from your instrument channel(s) into the hardware and how to properly return those effects back into your mix using the main section on the Triden 68.
If your instruments sound out of tune or are sliding randomly, Logic is sending and/or receiving unnecessary Pitch Bend data from your MIDI controller. I used to think this was a problem attributed to our older MIDI controllers, but it seems like Logic itself might be the culprit.
Here is a fix, but it does end up disabling your Pitch Bend, so if you do need pitch bend, you’ll need to do only step 2 and then keep your fingers crossed that the fix stays.
If you don’t need pitch bend at all, you can fix this problem by filtering the input and resetting the automation.
Step 1: Filter Pitch Bend Input
If you want to stop your keyboard from sending pitch bend data entirely:
- Navigate to File > Project Settings > MIDI.
- Click on the Input Filter tab.
- Check the box for Pitch Bend.
Note: This will disable the pitch wheel on your hardware for this specific project.
Step 2: Reset the Pitch Bend Value to Zero
If your track is still out of tune after filtering the input, there is likely a “stuck” MIDI event on the timeline.
- Select the affected track.
- Press Command (⌘) + Control (^) + E to open the Automation Events Editor.
- Locate the Pitch Bend column or information.
- Set the value back to 0 to restore the track to its natural pitch.
Please be mindful of personal and equipment safety when filming off-campus.
First, make sure you let me know your filming plan so we can address any concerns before the project starts.
Then, complete the permission form. (Keep reading to see what happens next.)
Once you submit the form:
- An email will be sent to you, me, our attendance secretary, and your parent/guardian email address you entered in the form.
- After reviewing the information in the email, your parent/guardian can reply all to give their permission.
- If you would prefer a paper copy of the form, I can print that and send it with you.
There is a chance that your headphones aren’t plugged in firmly or your system settings have the audio out of balance. More than likely though, you’re editing a project where we used a single mic to record audio into one of the two stereo channels.
This is exactly what is supposed to happen.
You correct this in Final Cut Pro’s Inspector pane (Command-4) under the audio tab (see the speaker icon up top).
Select the clip(s) you want to correct (either in the Timeline or the Browser) and change the Audio Configuration to Dual Mono. Then, disable the silent channel. See below:
I’ve got just the thing to help you out.
There is also a hard copy in the Studio One handbook.
Batteries are located on top of the laptop cart, just inside the door in Studio A. Help yourself, but let me know if we run out of AA batteries so I can replace them. Thanks!
Here are some places where students have found audio samples, sound effects, and music.
Freesound – https://freesound.org
Large library of sound effects. Many files are Creative Commons; attribution is often required.
SoundBible – http://soundbible.com
Simple, downloadable sound effects. Many are public domain or CC-licensed.
FreeSFX – https://www.freesfx.co.uk
Free sound effects for educational use (account required).
Zapsplat – https://www.zapsplat.com
High-quality effects. The free tier requires attribution; paid removes it.
FindSounds – http://www.findsounds.com
Search engine that indexes sound effects across the web (check licenses).
BBC Sound Effects Archive – https://sound-effects.bbcrewind.co.uk
Excellent real-world sounds. Educational, non-commercial use only.
NASA Audio Collection – https://www.nasa.gov/connect/sounds
Public-domain audio recordings suitable for school projects.
Music / Background Tracks (Free with Clear Licensing)
Incompetech (Kevin MacLeod) – https://incompetech.com/music
Free to use with attribution.
Free Music Archive (FMA) – https://freemusicarchive.org
Curated music under Creative Commons licenses. Good filtering by license type.
Bensound – https://www.bensound.com
Free tracks with attribution.
Purple Planet Music – https://www.purple-planet.com
Free background music for educational use; attribution required.
CCMixter – https://ccmixter.org
Music specifically designed for remixing and media projects under CC licenses.
Note:
Students are responsible for checking license requirements and providing attribution when required. Not all “free” audio is copyright-free.
The Studio One handbook is a white binder labeled “Control Room.” It is located on the side table (or occasionally the bookshelf) inside the control room.
Inside this binder, you’ll find instructions for all the hardware located in Studio One.
There is also a collection of checklists that will be updated and added to occasionally. I may point you to this handbook to answer a question.
This handbook is a reference that you might find useful when setting up a particular microphone or troubleshooting a piece of gear.
If you think of something that needs to be included in the handbook, please let me know!
This is typically a polarity issue — in other woeds, the pedal is sending the wrong MIDI data values (e.g., 0 when pressed, 127 when released when Logic is expecting the opposite).
Here’s a good video that covers it, or if you’d prefer to read below:
How do I fix sustain pedal polarity in Logic Pro?
Use the Environment window to reverse the MIDI data:
- Open Logic Pro and press Command + 0 to open the Environment.
- Create a Transformer object.
- Route it like this: Sum → Transformer → Input Notes → Sequencer Input
- Set the Transformer to filter or remap MIDI CC 64 values (sustain) to reverse the behavior.
Here’s some additional information
Q: What MIDI message is used for sustain?
MIDI Control Change CC64 is used for sustain pedal data.
Q: Are there other fixes?
- Check your pedal or keyboard for a polarity switch.
- Try software modifiers or consult community forums for device-specific tips.
Q: Any tips to avoid this in the future?
- Test pedals in multiple apps.
- Know your controller’s MIDI implementation.
- Learn to use Logic’s Environment for advanced troubleshooting.