All FAQs
Mac
Projects
Check out Mind Meister. Three mind maps with the free account you can set up with your LSR7 Gmail.
Video
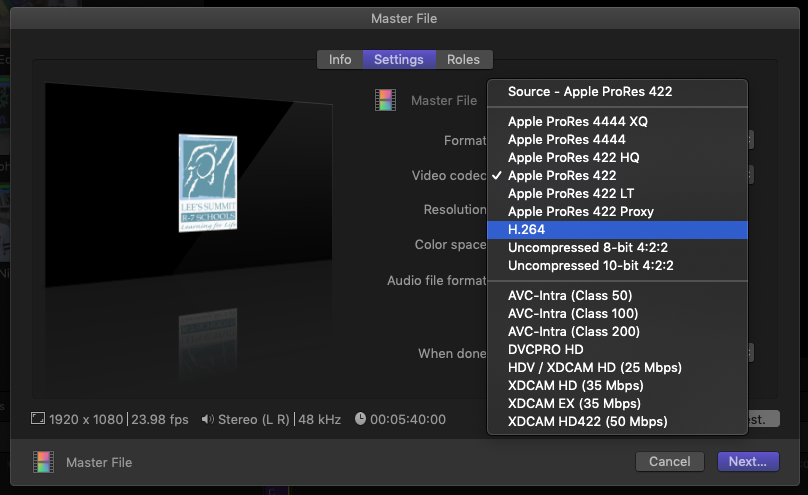
When you export (share) a video from FCP, the default option is set to a full-quality file, probably an Apple ProRes file.
Let’s be a little savvier about exporting. Go back to re-share (export) your project and double-check the Master File export settings.
Make sure you select H.264 from the Video Codec settings as shown below:
First off, what is a cyc?
Next — it’s quite a bit more fragile than I would like.
- Please be careful about stepping anywhere other than the floor (watch the curved sections as stepping on them causes cracks)
- Avoid scuffs and marks on the floor. That will ruin it.
Got it?
Here’s some advice on camera settings.
This is a quick demonstration of what you would do with the footage in FCP:
Here’s a quick video describing the process.
In short, your project needs to be 1080i, 29.97fps, exported using ProRes 422 setting. It may be possible to use h.264 but you will need to change the setting on the Hyperdeck as well.
You can change the length of a project in the project properties inspector.
If you want a project that is 30-seconds long, type “30.” In the duration box. The “.” Acts as a shortcut to fill out the frames. If you just type “30” you will end up with a project that is 30-frames long.
Check out Mind Meister. Three mind maps with the free account you can set up with your LSR7 Gmail.
This is a great resource from Ripple Training. An overview of the color grading and color correction process. If you find other resources, please share them with the team on Basecamp!
You’ve created a Multicam monster!
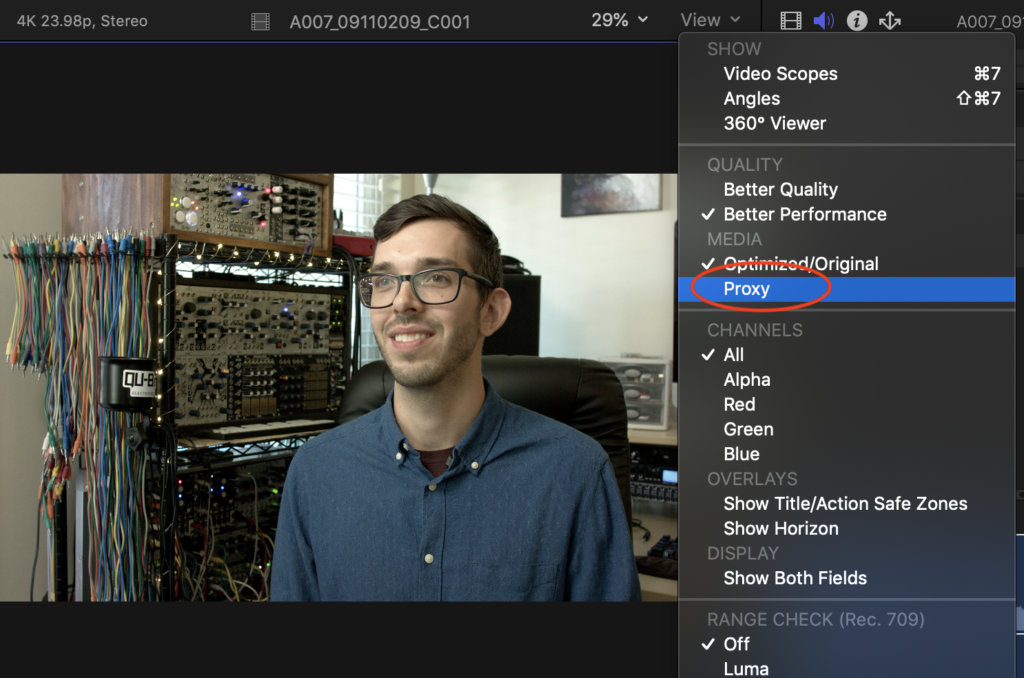
Sometimes our iMacs can’t keep up with the processing power required to run multicam clips in FCP X. Never fear, it’s an easy fix.
Before you start, you should know that you’re going to see a frightening red clip in the Browser after step 1, but that’s normal. Keep following the instructions to the end.
1.) In the View menu of the Viewer, change the media quality to Proxy:
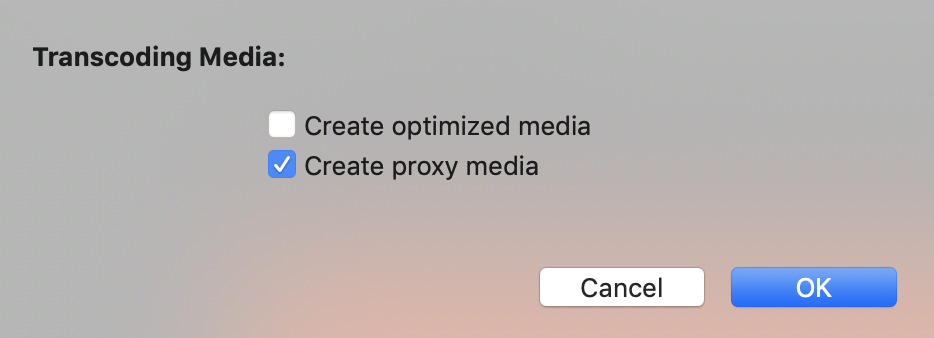
2.) Select all the media used in your multicam clips in the Browser and from the File menu, choose Transcode Media…
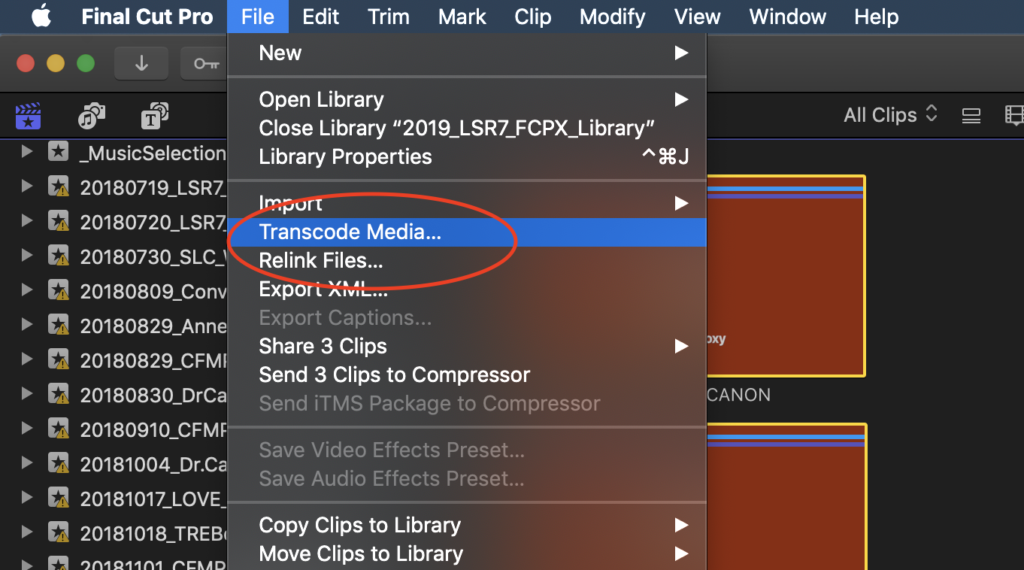
3.) Select Proxy and click OK. It will take a few minutes for FCP X to create your proxy media.
When you are ready to export, go back to step 1 and change the Media setting to Original/Optimized. FCP X will give you a warning if you don’t, but you’ve been warned before the warning now.
At one time or another, we all have to contend with vertical video. Hopefully, it’s footage that someone else gave us and not something that we captured ourselves.
Here’s a handy (and free) Motion template from MotionVFX: mVertical
Essentially, this Title template from MotionVFX works like an adjustment layer.
Sometimes I might suggest you check that your text is in the title safe zone. This almost always happens on the City of LS and LS Parks and Rec videos, but sometimes on other projects too.
Here’s a video that explains everything:
It sounds like you want to use an adjustment layer for an effect that covers multiple video clips in your timeline.
- Download the Alex4D Adjustment Layer from the Docs & Files > Adjustment Layer folder of the Digital Media Technology Basecamp HQ.
- Once it’s downloaded, double-click the .dmg file to open.
- Move the folder Alex4D Adjustment Layer to your user directory in the following location: Movies > Motion Templates > Titles
Here’s a short video that shows an adjustment layer in action. Let me know if you have more questions!